Monday, November 22, 2010

Thanksgiving Cactus

I planted this succulent basket back in September. See Succulent Container Garden . The cactus is apparently very happy with its new home because not only has it grown new leaves, it is now in full bloom.  Beautiful!  That's why I've re-named it Thanksgiving Cactus.

Speaking of Thanksgiving, I'm planning my menu for both the traditional feast in the early afternoon, plus hor d'oeuvres and desserts for later in the evening. Just how much of my own garden produce will I be using?
  • onions and a carrot for the dressing
  • green beans with butter
  • pickled beets
  • butternut squash
  • blueberries for a tart & blueberry nut bread

The rest of my produce will come from the store - locally produced whenever possible:
  • roasted sweet potatoes and cauliflower
  • pickles and olives
  • mashed white potatoes
  • pumpkin for pie
  • celery for dressing & raw for snacking
  • cranberries, apples, & celery for cranberry jello
Yes, there will also be a turkey. Now that's a feast.

Happy Thanksgiving to all my readers.  I really do appreciate the time you take to visit my blog.  I leave you today with a close-up of my Thanksgiving Cactus turned into pastel artwork via Corel Painter 11.

Wednesday, November 17, 2010

Planting Grass in November

It just doesn't sound logical to me.  Planting grass? Now? We're here in western NY. The weather has been unseasonably mild; last week was 60's and sunny.  But still, now it is damp, cool, and windy; it never got out of the 40's today.  We've had snow by Thanksgiving many-a-time.  Can we still get grass sprouted before winter truly sets in?

I used the internet, of course, in hopes of finding good advice.  All About Lawns   recommends planting between August 15 and September 15 in a 4 season climate.  But they also say "Just because you've missed the August to September window doesn't mean you're out of fall grass planting options. You can always take your chances planting a little later, particularly if you're enjoying an Indian summer. Or you can wait until late autumn to spread grass seeds. They'll remain dormant all winter, but when spring returns they'll start sprouting, giving you a jump start on the next growing season. There are risks -- the seeds can be washed or blown away by harsh weather -- but it's a good option for those who don't want to wait."

Notice the com-poster next to the new greenhouse base.
I think this week qualifies as late autumn. But my husband wanted me to spread some grass seed on our trench lines (See Greenhouse - Step 2) , and so I did.  I assume the seed will rot on the ground, but maybe it will come up next spring.  This is just another learning by trial and error for us.  Stay tuned on this one also; I'll let you know what does or doesn't happen.

Meanwhile, when I got home this afternoon, there was a surprise for me on the back patio.  The empty compost barrel had blown off its stand, across the lawn, and onto the patio (a distance of at least 50 yards).  Yes, it was that windy today.  I stood it on end so that it would hopefully travel no farther.  Grass seed?  It's probably over on the neighbor's lawn.  :)
That com-poster barrel got all the way over to the patio by itself!

Saturday, November 13, 2010

Greenhouse - Step 2

The excitement of our new greenhouse has been on hold since we ordered it back in the first week of September. We knew it would take 8 weeks to come from the factory in Vancouver, Canada.  Of course the wait has become even longer than that.  We might see it around Thanksgiving.

That's really okay, because it is taking us at least that long to get the prep work done.  We immediately took down the pine tree that was struck by lightning.  See Greenhouse - Our Big Fall Project  That is where we are locating the greenhouse.  Building permit?  No problem - DH is friendly with the building inspector; we had our permit in no time.  Then on to building the base. This didn't sound too complicated; we needed a footer of treated lumber set in a couple feet of crushed limestone.  But small projects have a way of growing and taking on a life of their own.

First, how to dig the base out?  The tree was gone, but not it's thousands of roots.  Digging by hand was impossible.  My son owns a skid-steer, but although he's only 10 miles away, he had no way of getting it here. Then DH started thinking about what he would need in his greenhouse to fully enjoy it -- electric and water.  Hmm.... that means laying lines to the house... 4 feet down.  Time to call in professionals.  Yesterday, our talented contractor came with a couple workers and a small excavating machine.  One solid day of work and now the base is ready to build upon. 2 trenches have been dug, laid, and filled - 1 for water and 1 for electric. (Yes, we considered putting both water and electric in the same trench, but that would have meant going through the patio, resulting in re-doing the patio pavers.  Please, not another project.)  Our contractor promised to return on a rainy day to finish the water and electric hook-ups now that the outdoor work is done.

FUN!  WOW!  Very tough on the back.
This greenhouse was supposed to be a "do-it-yourself" project.  Well, today we finally did a little ourselves.  Those trenches needed raking and readying for seed.  Two flower beds needed patching where the trenches chewed through them.  Lucky for us the weather is remarkable - high of 67 degrees and bright sunshine.  I'll admit it didn't take long before my back was screaming at me; thank goodness for DH! He was a workhorse today.

What's next?  The greenhouse should be delivered before the end of the month.  My first job will be to stain all the wood (cedar) parts.  I know I can do that myself.  Can we assemble it ourselves?  Stay tuned.  We'll give it a try. If need be, we'll call in the troops for a good old fashioned "greenhouse raising".


Greenhouse foundation - Water just outside greenhouse - Electric cable sticking up in the corner. We destroyed a huge section of our lawn for this small structure.  Hope it's worth it.

Thursday, November 4, 2010

Gingered Carrots

Now that the growing season is officially over, I don't feel guilty digging some of my carrots.  Yes, they keep quite well right in the ground, but it's not so much fun digging through snow to get to them.  Right now, we have them mulched with leaves, mostly to keep the deer away.  It's still easy to kick off a few leaves and pull the carrots from the ground.  In the dead of winter you need a shovel to dig the frozen ground. Maybe I can use them all up in the next month or so, and beat the worst of the snow.

This year's carrots grew very nicely.  They are long and straight with very few blemishes.  Nice.  We've learned the hard way that thinning the row of carrots early in the growing season is essential.  If they are not thinned, they twist around each other becoming stunted and deformed.  It's doesn't feel good to pull up perfectly healthy little plants, but you've got to do it.  We try to leave 2 inches between each carrot.

Carrots are a basic vegetable for me, almost like onions.  A carrot here, a carrot there - they go in soups, stews, salads, casseroles, and of course, raw with dip.

Today I'm using "Grandma Hill's" Ginger Glazed Carrots recipe. She was a great cook. I still enjoy using some of her recipes and remembering days past.


Ginger Glazed Carrots
1 pound carrots
2 Tablespoons butter
1 Tablespoon minced ginger, or 1 teaspoon ground ginger
1 Tablespoon brown sugar

Peel and chunk carrots into uniform pieces. Heat all ingredients + 1/3 cup of water to boiling in saucepan.  Cover and simmer until carrots are just tender. (About 8 minutes.) Remove cover and continue cooking, stirring    gently until liquid evaporates and carrots are glazed.

Tuesday, November 2, 2010

Jack Frost Makes His Appearance

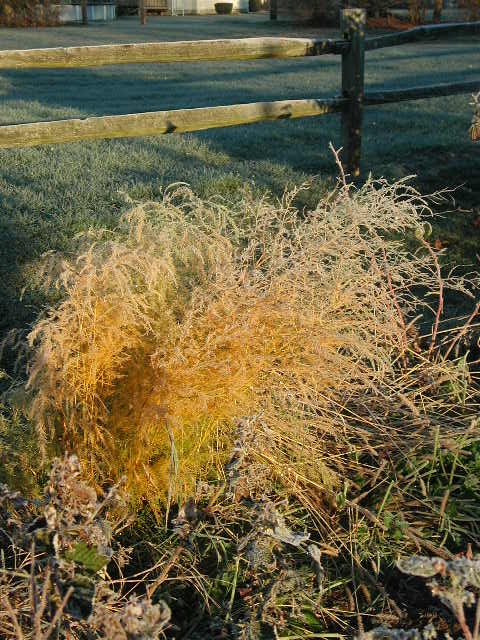
I woke this morning snug in a warm bed within a cold room - my favorite. It makes it hard to get up however, so I waited until I could see a pink sky peeking in my window. This was followed quickly by a happy sun and a bright blue sky.  The lawn, the bushes, and the trees all sparkled with a shiny coating of frost.  The thermometer read 22 degrees.  Brrr. 

Since this was the first heavy frost of the season I was motivated to get out with my camera.  It made me think of the many early morning sunrises with shimmering frost on the roadsides that I've enjoyed over the years.  I always wished I'd stop for pictures, but the work schedule called and I didn't.  Maybe this year I'll make the drive a few times solely for the pictures.

Here are a few beauties from this morning's backyard.
Asparagus
Redbud tree
Blueberries

Sunday, October 31, 2010

Honeymoon Salad? - "Lettuce Alone"

Happy Halloween!

It's the last day of October and we still have lettuce growing the the garden.  It's amazing!  It was planted at the end of July.  Even though we've had a couple of frosts, I covered it with a tarp on those few nights, and the temps did not get low enough to kill it.  We've been eating it since early September.  My DH planted it, but doesn't remember the variety. It's very much like Romaine lettuce - great for salads and in sandwiches. I've given it to neighbors and family.  It's been tender and delicious.  Now a hard freeze is predicted for tonight. It's fully mature; for the last week or so we've been eating the inner leaves.  I think I'll let it go tonight, but I say goodbye reluctantly; it's been a great crop.

Does this mark the official end of our 2010 vegetable garden season?  I guess, although we still have carrots, beets, and parsnips covered with leaves that I can dig as needed.  We harvest these root crops throughout the winter as long as the snow doesn't get too deep.  Of course, if we wait too long the deer will beat us to them.  I don't feel that bad if they eat the beets; I prefer them small and tender in the summer.  The carrots I've been digging a few at a time for the last month or so.  Parsnips we leave alone until after the first snows.  The cold weather seems to bring out their sweetness.  I've tried them earlier in the season, and they just don't taste the same.


This has been a wonderful crop of lettuce.


Friday, October 29, 2010

Animal Mysteries

A couple of mysterious happenings in our yard have made me pause and realize that my DH and I are not the only creatures enjoying this habitat.  In fact, as much as we consider this home, we're really just visitors.  Our yard is home to many creatures.  Here's a list of some of the animals we've observed in our village yard:
squirrels
chipmunks
moles
rabbits 
ground hogs
opossums
skunks
deer
fox
bear (We didn't actually see it, but he left his scat, and neighbors saw it 1/2 mile from us.)
toads
snakes
bees of several kinds
bugs of all kinds
butterflies
and birds, too numerous to list

The first mystery appeared on a pin oak on our back line.  Something has damaged the bark; it looks like it has been rubbed off.  We suspect the deer family that has been using our yard as their daily trail.  I hate to have them kill this tree, so I guess it needs fencing for the winter.

DH gets excited every single time the deer cross our yard; he's just like the dog in the movie "UP".  "DEER!" he yells as he runs to a window.  This occurs almost daily - sometimes 2 or more times. He's been trying to catch them on his Bird Cam; so far no luck.  I'm glad he gets such enjoyment from the deer, but they cause a lot of damage to my flowers, my bushes, our vegetables, but surprisingly not the blueberries.


The second mystery is this hole that appeared on the edge of the back lawn.  It looks almost like a woodchuck hole, but I don't think it is.  Notice the right side of the photo.  Yes, that is honeycomb.  It looks like an animal dug these bees from underground.  There are 3 big chunks of honeycomb with bees still crawling all over them.  I'm pretty sure the bees are yellow jackets. The comb is paper-like. The hole is deep and large - 12 inches in diameter.

Is this the work of a skunk?  What kind of bees live underground?  Will my DH be yelling "SKUNK" next?