Two of my favorite perennials are the Coneflowers (Echinacea purpurea) and Black-eyed Susans (Rudbeckia hirta). I like them for several reasons. First they are easy to grow and come back every year. Second, they make great cut flowers. And lastly, they seem to bloom just at the right time in my gardens -- the pansies and lillies are starting to wilt, while the hollyhocks and mums need a little more time.
For years my mother had her small front yard planted almost completely with Black-eyed Susans. They really are biennial plants (2 years to blossom), but easily reseed themselves. Once they are established, you'll have blooming plants each year. Black-Eyed Susans
The Coneflower is the true perennial. It's a little taller than the black-eyed Susan, but with a similar shaped blossom. Color and size of blossoms are the big difference. Coneflowers
What can I say? These flowers just make me happy. They say summer is in full swing, and we're here in our glory!
My husband and I are backyard gardeners. This blog chronicles the gardening endeavors of a couple novices. It's the process of growing that helps us appreciate the wonders of our world.
Saturday, July 31, 2010
Thursday, July 29, 2010
Can't Beat These Beets
The beets are getting ahead of me. We've been pulling and eating larger beets, but they seem to be growing quickly. Fresh beets are delicious when they are 2 inches in diameter or less. As they get bigger they get progressively more fibrous, and tend to lose their sweet flavor. So when I peeked under the greens and saw big beets pushing their way up out of the soil, I was guilt-ed into action.
I pulled a pail-full with the plan of turning them into spiced pickled beets. I hosed them off and cut off the tops outside. I leave about 2 inches of stem and I do not cut the root. This prevents the beet from losing its red color while cooking. I used to boil the beets, but experimented with roasting them this year. After another light scrubbing, I wrapped them in aluminum foil packets and baked them at 325 degrees for 2 hours. The roasting method develops a rich full flavor in the beets, and it's relatively neat compared to a boiling pot that spits red juice all over the stove-top. When the beets felt soft poked with a fork, I let them cool a bit before unwrapping them. Then I cut the tops and root off, and slid the beet out of its skin. I sliced my beets, but you can also cut them into cubes.
Here's the rest of my beet canning process:
There's a little beet juice in the foil packets, and I add that to the pot of syrup I have simmering on the stove. My syrup is 2 cups cider vinegar, 2 cups sugar, 1/2 teaspoon cinnamon, and 1/2 teaspoon salt. I also have a couple onions sliced very thin at ready. Now it's time to "can".
My canning jars, lids and screw tops are hot and waiting in the "just-finished-its-cycle" dishwasher. I take out one jar at a time. Drop 2 whole cloves in the bottom of the jar, and then fill it with sliced beets and a few onion slices. Ladle in the hot syrup up to 1/2 inch from the top. Use a wet paper towel, followed by a dry paper towel to wipe and dry the top edge of the canning jar. Put on a cover and screw it down. Continue until all jars are filled. I had to make a second 1/2 batch of syrup to complete my ten 12 ounce jars.
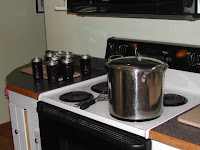
Last step: I use my large soup pot to process the jars. This step assures a good seal on the jars. I fill the pot to about half full and bring the water to a boil. Five jars fit at a time; you want space between the jars. Boil the jars 10-12 minutes; then remove and let them cool. As they cool, I could hear the distinctive "pop" that lets me know they have sealed. After several hours, I can touch the tops of the jars to test for a good seal. The cover should not pop up and down when you touch it. If it does, the jar needs to be reprocessed, or refrigerated and eaten soon. I did a good job this time; all my jars sealed!
This is a great recipe for pickled beets. They are great chilled and added to salads. You might have noticed that we grew 2 different varieties of beets. The traditional round beet is "Detroit Red". The long, tubular shaped beets is "Cylindra". "Detroit Red" is sweet and flavorful. The "Cylindra" is very dark red in color and slices into perfect small round disks. The flavor is good, but not quite as sweet as the "Detroit Reds". It's fun to experiment with new varieties.
I pulled a pail-full with the plan of turning them into spiced pickled beets. I hosed them off and cut off the tops outside. I leave about 2 inches of stem and I do not cut the root. This prevents the beet from losing its red color while cooking. I used to boil the beets, but experimented with roasting them this year. After another light scrubbing, I wrapped them in aluminum foil packets and baked them at 325 degrees for 2 hours. The roasting method develops a rich full flavor in the beets, and it's relatively neat compared to a boiling pot that spits red juice all over the stove-top. When the beets felt soft poked with a fork, I let them cool a bit before unwrapping them. Then I cut the tops and root off, and slid the beet out of its skin. I sliced my beets, but you can also cut them into cubes.
Here's the rest of my beet canning process:
There's a little beet juice in the foil packets, and I add that to the pot of syrup I have simmering on the stove. My syrup is 2 cups cider vinegar, 2 cups sugar, 1/2 teaspoon cinnamon, and 1/2 teaspoon salt. I also have a couple onions sliced very thin at ready. Now it's time to "can".
My canning jars, lids and screw tops are hot and waiting in the "just-finished-its-cycle" dishwasher. I take out one jar at a time. Drop 2 whole cloves in the bottom of the jar, and then fill it with sliced beets and a few onion slices. Ladle in the hot syrup up to 1/2 inch from the top. Use a wet paper towel, followed by a dry paper towel to wipe and dry the top edge of the canning jar. Put on a cover and screw it down. Continue until all jars are filled. I had to make a second 1/2 batch of syrup to complete my ten 12 ounce jars.
Last step: I use my large soup pot to process the jars. This step assures a good seal on the jars. I fill the pot to about half full and bring the water to a boil. Five jars fit at a time; you want space between the jars. Boil the jars 10-12 minutes; then remove and let them cool. As they cool, I could hear the distinctive "pop" that lets me know they have sealed. After several hours, I can touch the tops of the jars to test for a good seal. The cover should not pop up and down when you touch it. If it does, the jar needs to be reprocessed, or refrigerated and eaten soon. I did a good job this time; all my jars sealed!
This is a great recipe for pickled beets. They are great chilled and added to salads. You might have noticed that we grew 2 different varieties of beets. The traditional round beet is "Detroit Red". The long, tubular shaped beets is "Cylindra". "Detroit Red" is sweet and flavorful. The "Cylindra" is very dark red in color and slices into perfect small round disks. The flavor is good, but not quite as sweet as the "Detroit Reds". It's fun to experiment with new varieties.
Sunday, July 25, 2010
Onion Harvest
It's time to pull the onions! As you can see in the photo, the tops are dead and dry. We want the space in the garden for a second crop planting of spinach, so out come the onions.
My method of drying and keeping the onions involves braiding them together. It's kind of like making a French braid; every time you pull one of the 3 strands to the center, you add in another onion.
These are yellow onions. I grew some sweet onions last year, but they didn't keep well. The yellow onions will last all winter as long as I don't let them freeze. Right now the onion braids are hanging in the garage. Come December, I'll move them to the cellar so they don't freeze. When I need an onion I just cut one off the braid. Easy, peasy!
Buffalo Garden Walk
Buffalo, NY works hard at improving its reputation of snow and cold, and one successful endeavor is its annual garden walk. We just spent most of the day touring many city gardens, both large and small. Absolutely wonderful! The day started off overcast (actually it was pouring rain in Springville, 35 miles south of Buffalo), but the weatherman promised a great day in the city, so off we went. My daughter, son-in-law and granddaughter came in from Brockport and met us near Buffalo State College. We got an early start because we knew the crowds would appear as the day went on. It was smart planning on our part. Our morning tours were the best. Owners were friendly and talkative. By the afternoon, when more and more people arrived, it was near impossible to carry on conversations with the gardeners. It was great to have my son-in-law, the landscaper, along since he was able to identify most of the plants for us.
I love the garden walk because I always see new ideas, new ways to use plants, water features, garden art, and outdoor living areas. I'm always amazed at the variety of gardens. It's truly a way to show your individuality. The more unique the garden, the more I like it. My granddaughter's favorite was a simple front lawn full of plastic flamigos. A "photo-op" sign was added, so of course, we did.
I was especially admiring the hydrangeas. They came in whites, pinks, blues and purples. I saw traditional bushes, hydrangea trees, climbing vine-like hydrangeas, and tall spiky versions. I am jealous of them all since my 3 hydrangeas refuse to blossom for me. Mine are each planted in different areas - 2 shady and 1 sunny. It doesn't seem to matter; they all grow nice green foliage, but have no blossoms of any color. What am I doing wrong? Last fall I surrounded them each with a wire cage and then covered them with leaves. I thought maybe a protective mulching might make a difference. Nope. They die back to the ground; then grow again starting in the spring, but not a single blossom. Please leave me a comment if you can help me out with this dilemma.
Anyway, I can't compliment Buffalo enough for their garden walk. It really is a beautiful city with great architecture and some lovely neighborhoods. Yes, there are some rougher areas of the city, but even these have begun to replace empty lots with community gardens. They can be very proud of their efforts. I'll be back next year!
Wednesday, July 21, 2010
Wednesday is Auction Day!
My small village comes alive on Wednesdays. First of all, we have the Gentner Auction on Wednesdays. This is a unique mix of farmer's market, flea market, and auction house all rolled into one. On a nice day, people come from miles away simply to experience an old fashioned country market day. Secondly, since so many people come into town on Wednesday, locals have found that this is the best day for yard sales. Every Wednesday, all through the summer, there are a dozen or more yard sales where bargain shoppers can find almost anything for very little money. I rarely pay full price for my craft supplies or books; I just buy from my neighbors:)
Today, I was more interested in Gentner's auction. The heat and the dry weather have finally gotten to my hanging pots of pansies. Even though I watered them every day, I wasn't surprised that they couldn't get through the whole summer. It's just too hot. They lasted longer than I expected, and actually the pansies at the front door and in the flower beds still look good. But I needed something new for the hanging pots. I found 2 nice pots of wave petunias at the auction for $4.00 each. Can't beat that. I brought them home and quickly replaced pansies with petunias.
You never know what you'll discover in this village on Wednesday, and today was no exception. One of the landscape venders had a prickly pear cactus for sale. Just for fun, I asked him about it. My parents live in Southern Texas, and their yard is full of prickly pear cactus. I assumed that it could never survive our western NY winter outside, but the seller claimed otherwise. He said he had removed it from a pool area not far from here, and that it was so hardy it did not need to be brought inside for winter. I'm not sure I believe it, but for only $10 I'm willing to take a chance. So into the trunk it went.
I decided to plant it on the west side of the house. It's hard to get plants to grow here. The soil is dry and well-drained. It gets the afternoon sun. Unfortunately, it also gets the wind of the winter storms. I'll be sure to mulch it well come fall. Now comes my stupid moment. (Well, my husband shared the same stupid moment.) I got the leather gloves out, dug the hole, and then asked my husband for help getting it out of the pot. He sent me for shears to cut the plastic pot. Meanwhile, he decided that he could just dump it gently out. By the time I got back, he had it in the hole. I turned it slightly, patted it in, and brushed off the extra dirt. Did either of us put on the leather gloves? NO! It didn't seem prickly. The new growth was soft and supple. About 2 minutes later we both noticed the iching. We washed; we used tape and tweezers, but the almost microscopic spines will be torturing us for the rest of the day!
Here's some prickly pear facts. I'm still not convinced it will survive in western NY. Time will tell.
"Prickly pear cacti typically grow with flat, rounded platyclades that are armed with two kinds of spines; large, smooth, fixed spines and small, hairlike spines called glochids, that easily penetrate skin and detach from the plant. Many types of prickly pears grow into dense, tangled structures.
Like all true cactus species, prickly pears are native only to the Western hemisphere; however, they have been introduced to other parts of the globe. Prickly pear species are found in abundance in Mexico, especially in the central and western regions. They are also found in the Western United States, from arid regions in the Northwest, throughout the mid and lower elevations of the Rocky Mountains, and especially in the Southwest. Prickly pears are also the only types of cactus natively found to grow far east of the Great Plains states, as far northeast as Long Island, where it can be found in Northport.
Opuntia are the most cold-tolerant of the lowland cacti, extending into western and southern Canada; one subspecies, Opuntia fragilis var. fragilis, has been found growing along the Beatton River in central British Columbia, southwest of Cecil Lake at 56° 17’ N latitude and 120° 39’ W longitude.[2] Prickly pears also produce a fruit that is commonly eaten in Mexico, known as "tuna"; it also is used to make aguas frescas. The fruit can be red, wine-red, green or yellow-orange." (http://en.wikipedia.org/wiki/Opuntia)
Monday, July 19, 2010
Green Beans
I was surprised when I checked the bush beans today. Lots of beans! I thought I had a few more days to wait, but instead I picked a large bowlful. We like green beans grown on bush plants. They are so easy to grow. We plant a couple rows planted about 2 weeks apart. That way they don't all produce at the same time. A quick wash, snip the ends, and then 3 minutes of steaming - delicious!
The extras will be frozen for winter fare. That's easy to do also. Dump the beans into boiling water for about 2 minutes, then quickly transfer the beans to an ice water bath. That's called blanching, and it's necessary to preserve the fresh picked taste after produce is frozen. Pack the drained beans in a freezer bag, label, and pop into the freezer. I used to freeze the beans first on a cookie sheet before bagging them. That way they can be scooped out individually, and you can use just the amount you want. However, I've discovered if the beans are well-drained, I can simply freeze them in the bag and then knock the frozen bag once on the counter to separate the beans.
My last bean tip: If some beans seem to be a bit overgrown, separate them out and freeze them with the label "soup beans." Fully mature beans actually are the best for vegetable soups.
Sunday, July 18, 2010
Camp Grandma
It's been Camp Grandma week! My 7 year old granddaughter, Maggie, spent the last week with us. We had a lot of fun, but there was very little down time, or computer time. We held a yard sale, picked lots and lots of blueberries, played with cousin Brodie, swam in friends' pools, made some garden art, and had a camping sleep-over in the backyard. Whew! Maggie did great, but Grandma is beat! We returned her to her parents yesterday at our family reunion.
As for the gardens, I'm hardly able to keep up. Both my husband and I have picked berries every morning and evening for the last week, averaging 8 - 10 quarts per day. Everything we pick flies off the stand; we can't keep up with the demand. I had made blueberry jam from the last of frozen '09 berries, and that has disappeared also. Then there's that prolific summer squash. Everyday my granddaughter hunted for the squash, and what we couldn't eat that day, was added to the stand under the "FREE VEGETABLES" sign. It too seems to find a home. We tore out the pea plants, ate a few beets, and had the first couple crunchy cucumbers. Yum!
Maggie used the gardens for a couple cooking projects. First she discovered the chives, and after she chewed on a few leaves, decided that they were quite tasty. So she cut a handful, we brought them into the house, chopped them into 1/4 inch pieces and stirred them into cottage cheese. She ate some right away, and declared it to be delicious. However, I can tell you it was even better the next day after the flavors had time to blend. Simple, but good.
Second, she tried out the mint. Yes, Maggie, it tastes like gum. She cut some sprigs of mint, brought it in, and stripped off the leaves. With help from Grandma, we boiled water and made some mint tea. First she tried it warm and plain - not for her. Then we added sugar and ice, and she loved it. (By the way, mint is such an invasive plant that I first planted it in a plastic bucket before planting the bucket into the flower bed. I was hoping to keep it from spreading. Good thought, but it didn't work. It has jumped right out of the bucket. Now I regularly pull it like a weed to keep it under control. Hard to contain, but great as a flavor or garnish!)
Saturday, July 10, 2010
It's Blueberry time!
It's time to pick the blueberries. The heat of this past week has really brought them on quickly. Last year's calendar said we picked the first quart on July 13th. This year I picked the first 3 quarts on July 8th. Yesterday we picked 7 quarts, and today another 4 quarts. I gave away the first quarts to neighbors, and then yesterday decided I better get my stand and signs out. Neighbors watch for my simple sign at the corner, and all we've picked quickly left the stand. It's been so hot this week that I picked right after my early morning walk (about 8 am). My husband helped me pick this weekend; I always appreciate that. It's easy to pick blueberries - no prickers and no bending - but it's time consuming and sometimes the bugs get after me. It's often either very hot(during the day) or very wet (in the early morning).
Right now, at the start of the season, some of the berries I pick still have a rosy glow and are not fully dark blue. That's ok; they finish ripening off the vine, just like most fruits. Leave them on the counter over night and they will be fully ripe and dark blue in color by morning. Put them in a brown paper bag and they will finish ripening even faster.
I had about 8 quarts of berries in my freezer left from last year's crop, so I decided to make jam. I made 2 batches and put them out with the fresh berries. Time will tell if anyone is interested. Blueberry jam is good; I always give it away at Christmas time. One of my friends calls it "summer in a jar"!
Now that berry season is here gardening chores will definitely increase. We sell our berries off a little red cart on the front walkway. The "honor system" has worked well for us over the years. People take what they want and leave money in a jar. It's hard to stay up with the berry demand, but it sure is fun to find money "magically" appear in the jar.
Thursday, July 8, 2010
Daisies
He loves me ... he loves me not. Who hasn't used a wild daisy to foretell true love? I love daisies. They mean summer sun is here. I don't even care whether the daisy is a "Shasta" variety or simply a wild one that seeds itself in my beds. I have 2 of the wild variety this year - 1 in my side flower bed and another one in the back. I don't know where they came from, but I can recognize their jagged leaves when I'm weeding out my beds in the spring, and I do my best to leave them be. The wild daisy in the side flower bed is huge and really very glorious. I had to prop them up with some plant supports because of the number of blossoms. -Very pretty and they didn't cost me a dime. The larger Shasta daisies grow in the back bed. I bought one plant years ago and each year since it has greeted the summer sun with its happy petal faces. It's been a very hot week -90's - and no rain. I've been watering all the potted plants every day, but not the daisies. They seem to love the heat and the sun. Rain is forecast for tomorrow. That's good. All the gardens need a good long drink.
Monday, July 5, 2010
Happy July 4th!
Yesterday was a great party day! The weather was hot and sunny, but our shade trees and a nice breeze in the backyard kept everyone comfortable. Well, that and the sprinklers set up for the little kids. Simple pleasures for us! Thanks to all the relatives who spent part of their holiday weekend with us. It was great to visit with all. My brother-in-law was bothered by the flower beds. "...way too prim and proper." So he took it upon himself to add a little garden art. Hmmm.
Today the temps reached 92 degrees, and what did I make? - vegetable soup. It was actually my husband's request, and I was able to get almost every ingredient straight from the garden. I used onion, summer squash, peas and spinach from the garden. I had left over beef stock from yesterday's Beef on Wick. Barley and 2 tablespoons of tomato paste gave the soup a little body. Finally, some cooking sherry, oregano, salt and pepper rounded out the flavor. We're big soup eaters, even in the summer. Eaten lukewarm, it was very good.
Saturday, July 3, 2010
Summer Squash
Just because summer squash grows easily is not a good reason to plant more than 1 bush. We don't even like the yellow varieties very much - dark green zucchini is what we want. So why does my husband have a whole garden full of summer squash? Honestly, I don't have a clue, but here we go again.
They are just starting to produce, and we'll never be able to eat it all. I try to check the plants every day, and pick the squash when they are small - very small! Yes, they'll grow into baseball bats if you let them, but any squash larger than 2 inches in circumference is really uneatable. What we can't eat, I'll try to give away. Even that is a challenge; often the excess ends up in the compost.
I do have a good recipe for zucchini cake (bread), and that's what I used today. Tomorrow is July 4th and family is on the way. The grandkids will devour the cake and never even realize there are veggies in it. The cake is moist and spicy. If I want it to be more like a quick bread, I simply add a little more flour.
3 eggs
1 cup vegetable oil
1 cup brown sugar
3/4 cup white sugar
2 cups grated zucchini (or any summer squash)
2 cups flour (or 3 cups for bread)
1/2 teaspoon salt
1/4 teaspoon baking powder
2 teaspoons baking soda
2 teaspoons cinnamon
1 teaspoon ginger
1 teaspoon cloves
1 tablespoon vanilla
1 cup walnuts
They are just starting to produce, and we'll never be able to eat it all. I try to check the plants every day, and pick the squash when they are small - very small! Yes, they'll grow into baseball bats if you let them, but any squash larger than 2 inches in circumference is really uneatable. What we can't eat, I'll try to give away. Even that is a challenge; often the excess ends up in the compost.
I do have a good recipe for zucchini cake (bread), and that's what I used today. Tomorrow is July 4th and family is on the way. The grandkids will devour the cake and never even realize there are veggies in it. The cake is moist and spicy. If I want it to be more like a quick bread, I simply add a little more flour.
Zucchini Cake (or Bread)
Mix together and bake at 325 degrees for 55 minutes:3 eggs
1 cup vegetable oil
1 cup brown sugar
3/4 cup white sugar
2 cups grated zucchini (or any summer squash)
2 cups flour (or 3 cups for bread)
1/2 teaspoon salt
1/4 teaspoon baking powder
2 teaspoons baking soda
2 teaspoons cinnamon
1 teaspoon ginger
1 teaspoon cloves
1 tablespoon vanilla
1 cup walnuts
Friday, July 2, 2010
Geraniums
Cemetery Flowers - That's what my daughter-in-law dismissively calls the geraniums. Yes, they often appear in cemetery urns because of their hardiness. I started about 4 years ago with 10 small geraniums chosen for their red color. I wanted something red for the front of the house to match my red front door. Little did I know that my husband would become a geranium fanatic. He brought those first 10 geraniums into the basement after the summer was over. Using a folding table and 1 old florescent light, he started by cutting them way back. Of course, he couldn't throw the cuttings away, so he stuck those in potting soil. The original plants continued to grow and even bloomed in the winter. Everytime they got leggy, my husband cut them back again. The cuttings took root easily and 4 winters later those 10 original plants have become more geraniums than I can count. Everyone who visits gets a geranium or 2 to take home. We take them to family gatherings by the tray-full. Right today, I counted 33 geraniums in our gardens, and another 6 still waiting in the basement.
They do have several qualities to commend them. The bright red blossoms make a striking statement. The blossoms last quite a long time, and continually renew themselves throughout the summer. I like to plant them in pots because then I can move them around to wherever I need some color. Perennials are great, but they only blossom for short periods. Geraniums look great tucked in between the greens of perennials waiting for or finished with their blooms.
Cemetery flowers? Is that a bad thing? Not for me. My geraniums have earned their places in my gardens - and they keep my husband occupied all winter long. :)
Subscribe to:
Posts (Atom)